 Yet another helpful tip for the open source fans in panography out there. This little tutorial focusses on creating high-resolution little planets with hugin.
If you like to create so called little planets from your equirectangular 360° image, there is a way to do it open source. Surprisingly, the answer is: Hugin. Yes, you are right, hugin is a stitching tool! But it can be used in various ways, and some interesting features of hugin are in fact the projections, even if you have your image stitched already.
If you load one single image into hugin, it won’t stitch anything, but it will still process the image as it would the result of a stiching job, so you can set projections and an output sizes and export the image. Hugin becomes an image processor, a powerful one.
How to do it
The input image should be an equirectangular image with the aspect ratio of 2:1, covering a full sphere of 360° x 180°. Load the image and set the projection to „Equirectangular“ and the HFOV (Horizontal Field of View) to 360°. Hugin will then calculate lens parameters, but we shouldn’t care about that.
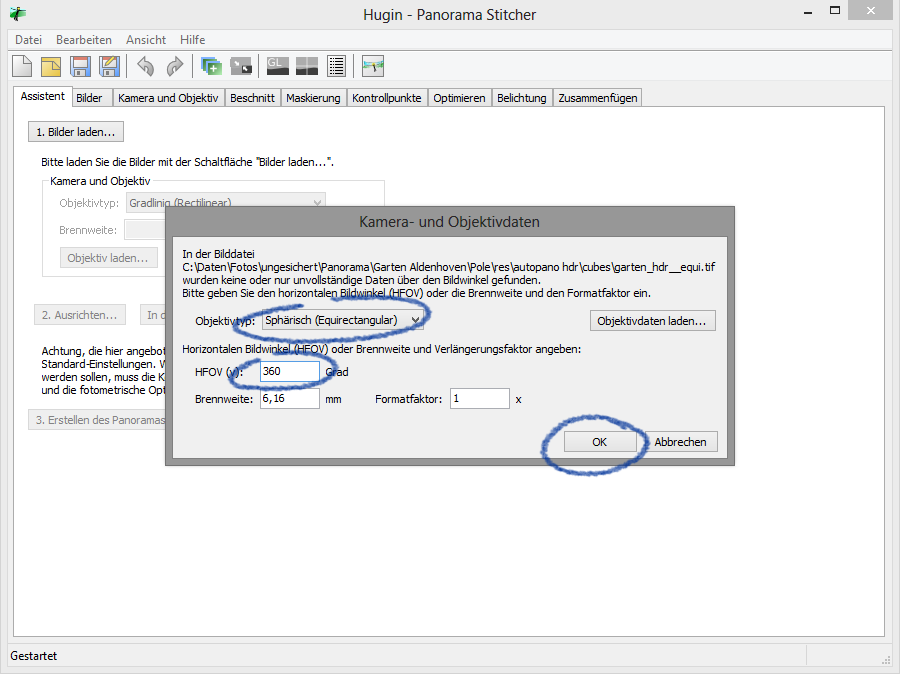
After you have done this, hit „OK“. Usually, you would start the aligning process in hugin at this point. You would set cropping/masking parameters, work on control points and so on, but now, you go straight to the tab „Stitch“.
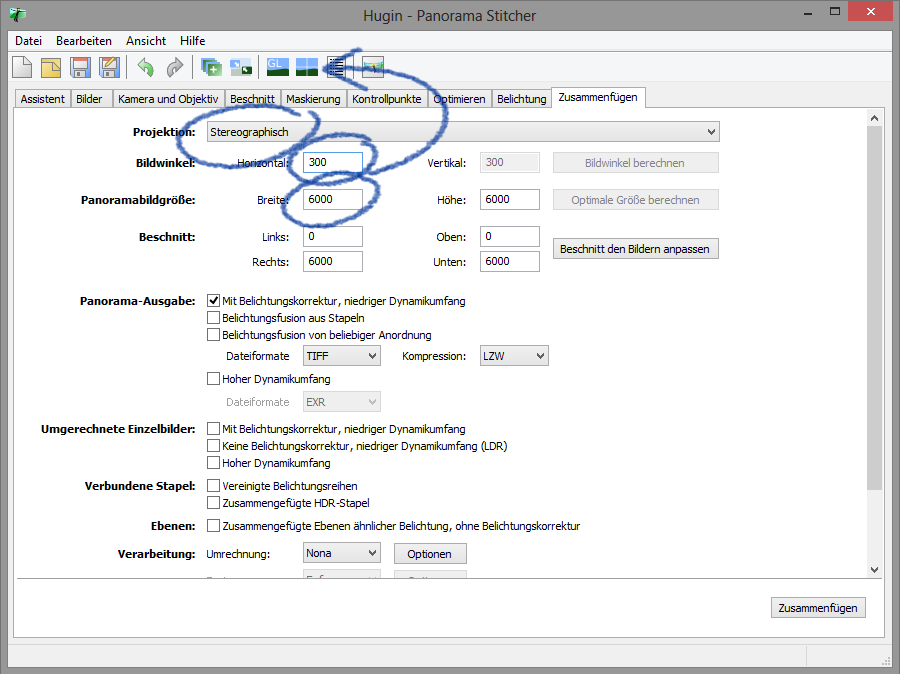
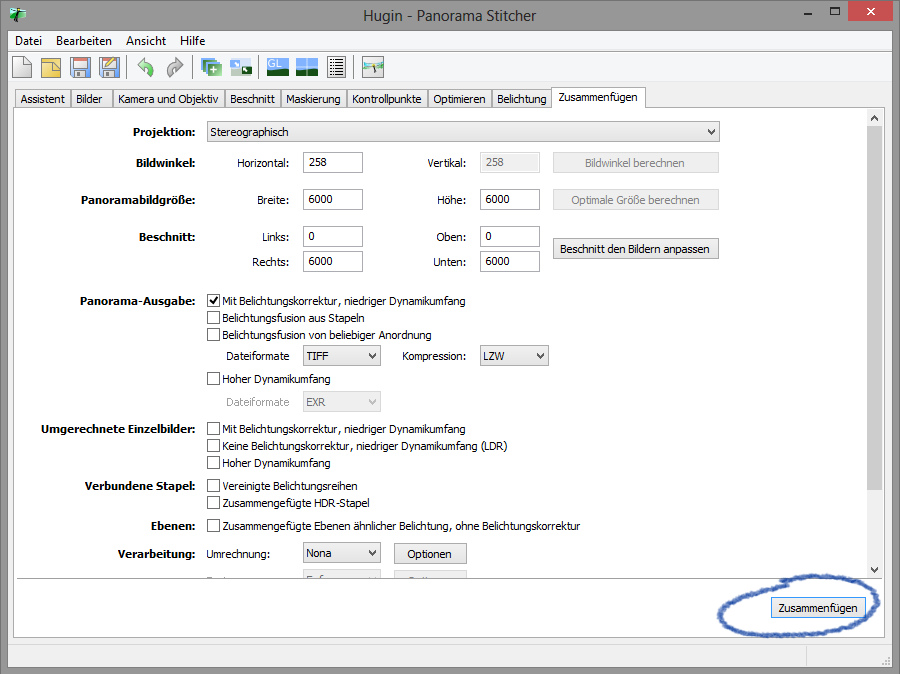
Here, you have to set Projection to Stereographic (default is Equirectangular) and Field of View to something smaller than 360 degrees. I usually start with about 300, but that’s not important, because this setting will still change in the next steps. Also, you should increase the Canvas Size so your resulting image has a resolution that is sufficient. When you are done, click on the little icon above that brings you to the panorama preview.
In this window, you can already see the panorama projected as a little planet. With the slide below the image, you can now set a zoom level. By clicking on the image, you can set another central point and so, you can change the appearance of the little planet until it looks like you wanted it to.
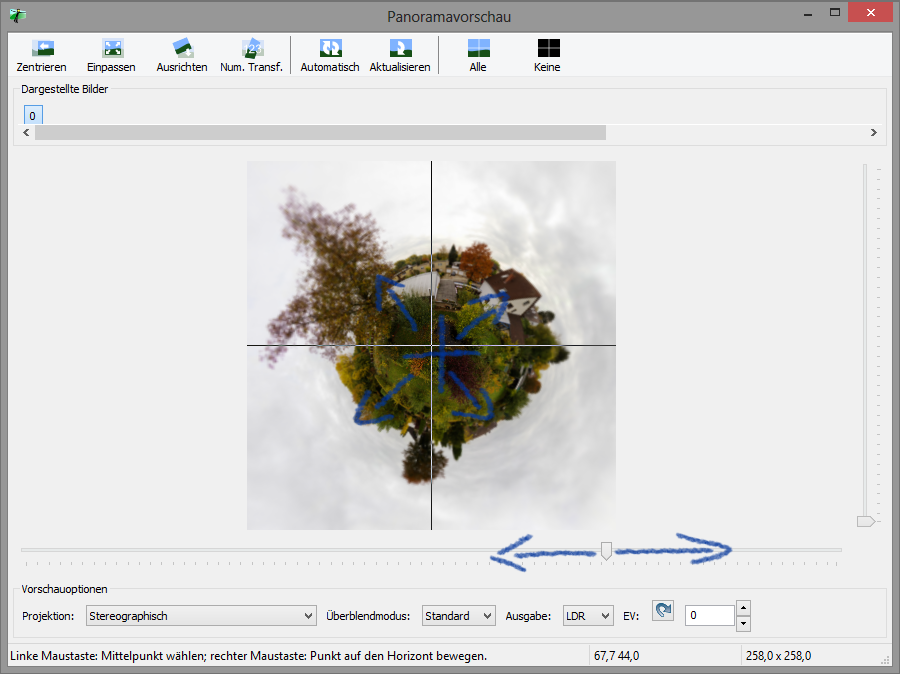
You can just leave the panorama preview window. You can now see, that the Field of View has been changed by hugin as you were zooming in and out.

Next, click on the button Stitch!, save your project somewhere on your computer and hugin will create your high-resolution little planet panorama.
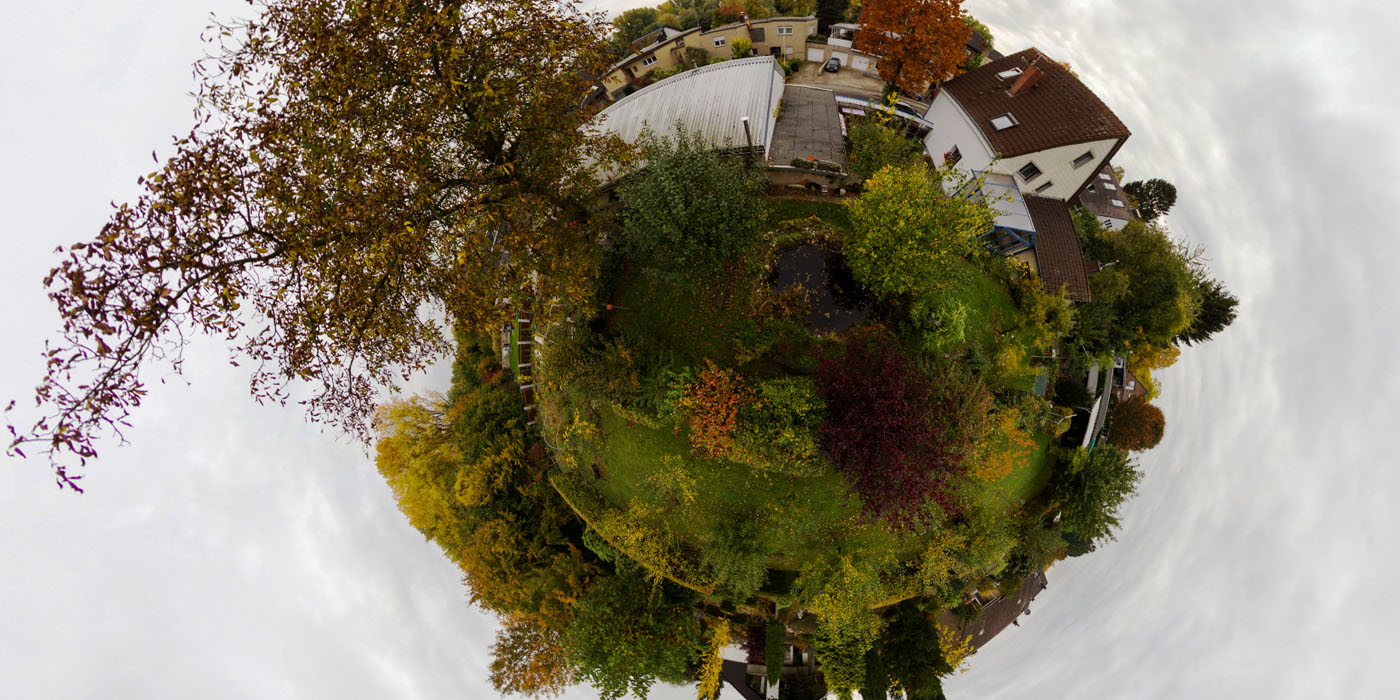
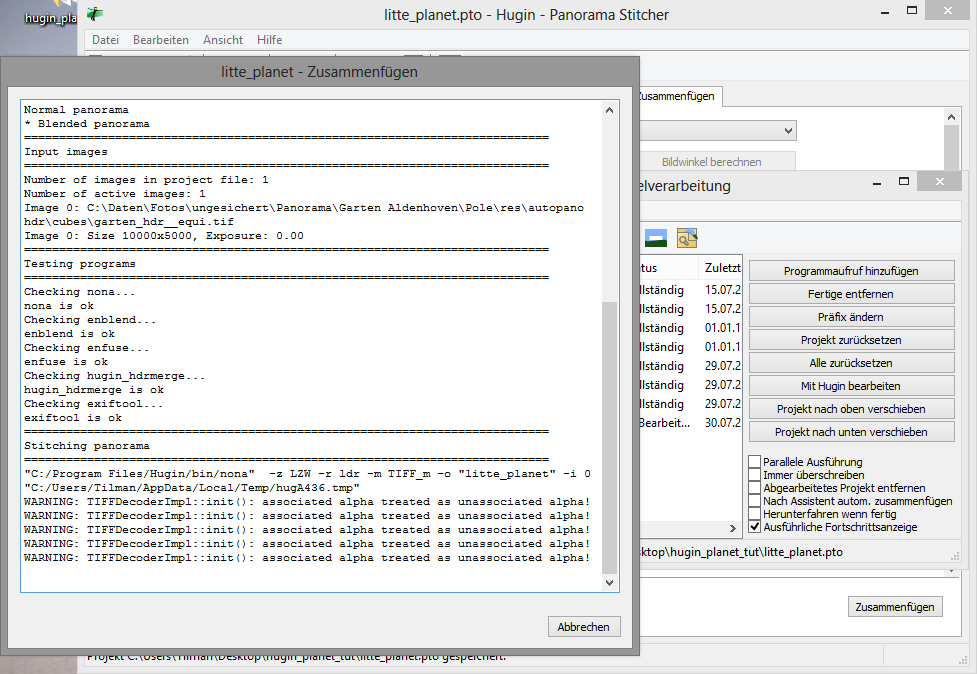
After hugin has done it’s magic…
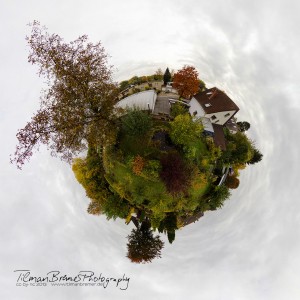
… this is the result:

Hallo Tilman,
Thank you for this tutorial, indeed for all of them. Great idea to use Hugin to make miniplanets, i love them. But did you know with Panini this is also possible, works even better!
Grusse aus die Niederlande 🙂
Hendrik